Spelt Bread
2 T yeast
1/2 cup lukewarm water
1/4 cup apple cider vinegar
1 cup honey/maple syrup/molasses
1 cup olive oil/melted lard
4 tsp salt
6 cup lukewarm water
spelt flour
Yields 8 loaves.
Directions and illustrations below. The original recipe (which will be in italics throughout this post) never did give a specific quantity for the flour. For the sweetener and oil, you can use what you have. I wouldn't use all molasses though, unless your family really likes it. For a while I used lard, rather than olive oil, but olive oil is quicker.

I have made bread for our family off and on for as long as I can remember. For the last year or so I have been making the majority of our bread. I haven't perfected any one recipe, but have used this Spelt Bread recipe for a while. I got it out of a
Keeper's at Home magazine. I lost that issue, but thankfully I remembered the recipe.

Up until about two years ago we didn't grind grain, though I wanted to try it and see if it really did improve the flavor of the bread. (It does.) One of Mom's patients gave us a hand grinder. At first all of us kids were excited about grinding berries, but the excitement quickly wore off. We still wanted to grind our own flour, so we kids pooled our money and bought a grinder attachment for our Champion juicer. It was, and is, great not having to grind by hand anymore.
 Proof the yeast in 1/2 cup of lukewarm water and 1-2 T of honey. In another bowl combine the vinegar, oil, honey, water, and salt. Stir in the proofed yeast. Add enough flour to make a pancake like batter. Let it sit for 45minutes-1hour or until it begins to bubble.
 Sometimes I let the sponge sit for the
allotted time, but usually longer. If I plan ahead I'll start making the bread the night before and let the sponge sit over night. This gives it a slight sourdough taste, that I don't notice. When I do this, the bread seems to be less crumbly, a common problem with spelt.

Here is the sponge after sitting all night.
Stir in the flour until it is to stiff to stir. Pour it out and knead it 8-10 minutes, adding flour as needed. I have started adding the salt at this point instead of at the beginning, because I read that it gives your dough a shine. If I have enough flour ground I'll add it in until the dough is to stiff to stir and then dump it onto the table to knead it, adding flour as needed. I use some white spelt in addition to the freshly ground whole spelt, to make the bread a little lighter. For variation I've added 2 c. rye flour or 1c. sesame seeds. I add the sesame seeds into the "pancake batter". They are
unnoticeable in the final product. I recently read that it is not good to
over knead spelt. I usually knead it,until the dough no longer sticks to my hands and forms a nice ball.
 Let the dough rise 2-5 hours.
 I punch down a couple times throughout this time. I rarely let it rise longer than two hours, just because I want to get the project done.
 Divide the dough into 8 equal pieces and form into loaves. Let rise 1/2 an hour.
 I
usually make a 1/2 or 3/4 recipe, because we don't eat a lot of bread. Whatever size I make I use the dough to make 3/4 the amount they give. Otherwise the loaves are tiny. For example: if I make a 1/2 recipe I only make 3 loaves. Sometimes I'll combine my labor and make pizza crusts while I'm at it. This bread dough makes O.K. pizza crusts. My brothers prefer it when I make pizza crust with a pizza crust recipe. I wonder why :) ?

It is important to let the dough rise no more than 1/2 an hour. It will finish rising in the oven. If you let the dough rise to it's full height, it will sink in the oven. If you wonder why I prick the bread it is because if you don't the crust will be wrinkly. (I did test this one out myself.)
 Bake the loaves @ 350 degrees F for 30 minutes. Remove from the pans and let cool.
 I usually let the bread bake for 40 minutes, otherwise, I find that it is still doughy in the middle. Also, I put a small dish of water in the oven to create steam. Our restaurant friend told us it helps the yeast work better. I haven't tested this, but have taken her word for it.

I enjoy the process of bread baking, but the end result is the best. This recipe may sound like it takes a long time. It does take a long time, but not the baker's time. I don't spend more than an hour in the kitchen working on this from start to finish.
You can freeze this bread. If you plan to eat it within the week it is best to store it in the refrigerator. It tastes best the first day, but if you toast it in the following days, it is still yummy.
I know that some of our readers bake bread, specifically spelt bread. We'd enjoy it if you left your recipe in the comments or emailed it to us. I'll give it a try, maybe we'll like it better than this recipe.
~JoAn
P.S. Food for thought. Baking bread makes me think of when my Savior said, "I am the Bread of life." It puzzles me, but makes for some interesting meditation.
 Pick cabbages that are heavy as they contain more liquid. How many you need will be determined by the size of your jar.
 We then cut the core out of the cabbage and sliced it in pieces that would easily fit through the food processor.
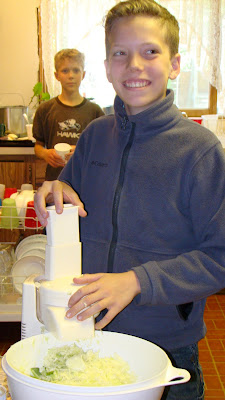
 The children pitched in, Thomas ran the food processor. We did a head of cabbage into a thatsa bowl. The recipe says to add 1 Tbsp of salt per 2# of cabbage. We added that amount per head.
 Then the fun begins. You mix in the salt and then pound out all your stress on the cabbage. You pound it until all the cabbage is bruised, there is liquid in the bottom, and it only takes about half the original volume. It will look soft and rather wilted when you are through. You will want to have lots of helpers at this stage. This takes a lot of strength and energy. You use a wooden 'stomper' to beat up the cabbage.
 As each head is finished you put the cabbage in the jar and GENTLY stomp it down. You want to eliminate air pockets in the cabbage.
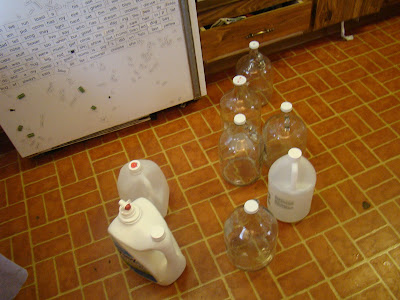
 Remember, I said stomp it GENTLY in the jar. T-Bob was a little bit too vigorous and banged the jar too firmly and broke the jar. This was very sad. Fortunately, we had another jar. Unfortunately, It was a LOT bigger, and so instead of being almost done, we still had a lot of work to do.
 We overfilled the jar. This was due to our lack of experience. You want to leave about 2" or so between the top of the cabbage and the top of the jar. You will need to have a lid on your jar, but not a tight seal. You leave the cabbage sitting out on the counter for 3 days and then refrigerate it. It is ready to use after 3 days. It will work and bubble while it sits there. If you fill it too full it will run over the top and make a mess. We ended up spooning out the extra liquid so it would behave.


