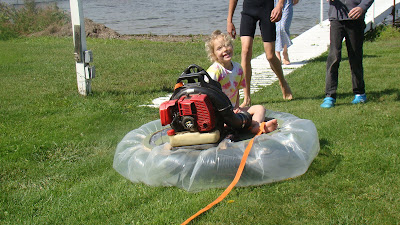
This is what happens when you give Mr. Boots a vacation!
 I decided to make a hovercraft. I had been thinking about it for awhile so when I got off school, I was on it. Thomas was my helper and Elizabeth was my test dummy.
Prototype 1.0
First, I had to make the platform out of 1/2" plywood.
 Then my dad got me a carlisle semi inner tube. I used it as the skirt to trap the air. I still needed a way to hold the skirt to the platform.
 I cut slits in the plywood with a jigsaw as a way to strap it on.{see next three pictures]

 Beautiful!!!!!!!!!!!!!!!!
 Finally, to mount my air supply, a BR630 Shindawia leaf blower with the tubes removed.
 My high tech mounting system {2/4}'s
Conclusion: 1.0 worked well on the pavement but when you got to to the grass the skirt wasn't quite supple enough to lift heavier objects[it worked well with my test dummy].
Prototype 2.0
Prototype 2.0
On prototype 2.0 I used plastic instead of a inner tube which presented a host of problems.
It was a lot more labor intensive then the inner tube.
I used some if our meager supply of duct tape to temporarily secure the edge.
 Second, I used plywood to clamp it using screws
 see also below
 This is what it looked like when I flipped it over.The next steps are the most important ones.
 I cut a disk {upper right hand side} about 10" in diameter and screwed it to the center of the platform.
 Second, I used plywood to clamp it using screws
 see also below
 This is what it looked like when I flipped it over.The next steps are the most important ones.
 I cut a disk {upper right hand side} about 10" in diameter and screwed it to the center of the platform.
Next I cut five holes{1.25"} in the plastic at a distance of about 1'ft from the small disk.
 I mounted the blower as before and we were ready for the moment of truth!
 I mounted the blower as before and we were ready for the moment of truth!
As I mentioned before... there were many kinks we had to work out.
P.S. If you would like to see the hovercrafts in video visit my mom's Facebook.....................................We even took it out on the water!
~Mr.Boots
PS. Mr. Boots is studying Physics this year. Should help in future projects! MOM


No comments:
Post a Comment